
Knowing how to handle small electronic repairs at home is a practical skill with clear benefits. Many everyday devices—remote controls, charging cables, and small appliances—tend to wear out or malfunction over time. Taking care of simple repairs yourself means fewer household disruptions and less time spent waiting for professional service”Top 5 Common Electronic Repairs”.
Addressing minor faults promptly can reduce replacement costs and extend the life of widely used devices. Practicing safe repair habits protects both your home and personal well-being. These straightforward tasks help build confidence while saving money, making basic repair skills a strong addition to any homeowner’s toolkit “Top 5 Common Electronic Repairs”.
Safety First: Essential Precautions Before You Begin
Attempting electronic repairs at home is practical, but safety takes priority before any task. Adhering to established precautions reduces risk and ensures a controlled environment. Simple errors may result in electric shock, injury, or equipment damage. Review these core steps before starting any repair on household electronics.

Disconnect Power Sources
Always disconnect devices from all power sources before opening, removing covers, or handling internal parts. This includes unplugging mains-powered equipment and removing batteries from portable items. Power sources, even when the device appears off, can retain current in some components.
For electronics with capacitors—such as televisions, monitors, or audio equipment—wait several minutes after unplugging. This lets built-up energy dissipate. Verify that indicator lights are out, and double-check power switches.
Use Proper Tools and Safety Equipment (Top 5 Common Electronic Repairs)
The correct tools not only make the repair process easier but also safer. Use insulated screwdrivers and tweezers rated for electronic work. Avoid using household tools that may slip or cause a short circuit.
Wear safety glasses during soldering or when breaking open sealed cases. Protective gloves—preferably those designed for electronic work—can shield hands from sharp edges or hot components. See additional general device safety guidelines at iFixit’s Device Safety.
Manage Static Electricity (Top 5 Common Electronic Repairs)
Static electricity can damage sensitive electronic parts. Work on a non-carpeted floor and avoid wearing clothing made of synthetic fibers. Use an anti-static wrist strap when handling circuit boards, memory chips, or exposed microchips.
If a wrist strap is unavailable, regularly touch a grounded metal object to discharge static build-up before handling electronic parts. Preventing static damage is especially important for computers or devices with exposed integrated circuits.
Understand Personal Limits (Top 5 Common Electronic Repairs)
Not all repairs are safe for home completion. Tasks involving high voltage, such as microwave ovens or CRT televisions, pose risks even when unplugged. Assess the complexity before proceeding; if unsure, consult a qualified professional or reference established best practices for electronic repair and maintenance at Fluorostore’s blog.
If a repair appears to extend beyond basic mechanical work—such as fixing a power supply or reworking an internal circuit—evaluate whether to proceed or seek professional help. Personal safety and device integrity always outweigh potential savings.
Prepare a Clean, Organized Workspace (Top 5 Common Electronic Repairs)
Set up a dedicated area with good lighting, a stable work surface, and plenty of room. Remove liquids, food, and unrelated clutter to reduce the chance of accidental damage. Keep tools, screws, and small parts organized, and be mindful of where components are placed during disassembly.
Maintaining order reduces the risk of mistakes and streamlines reassembly. Adhering to these protocols results in safer, more successful repairs. For guidance on what to avoid during these tasks, review common mistakes at Chemtronics: Top 12 Mistakes Made When Repairing Electronic Circuit Boards.
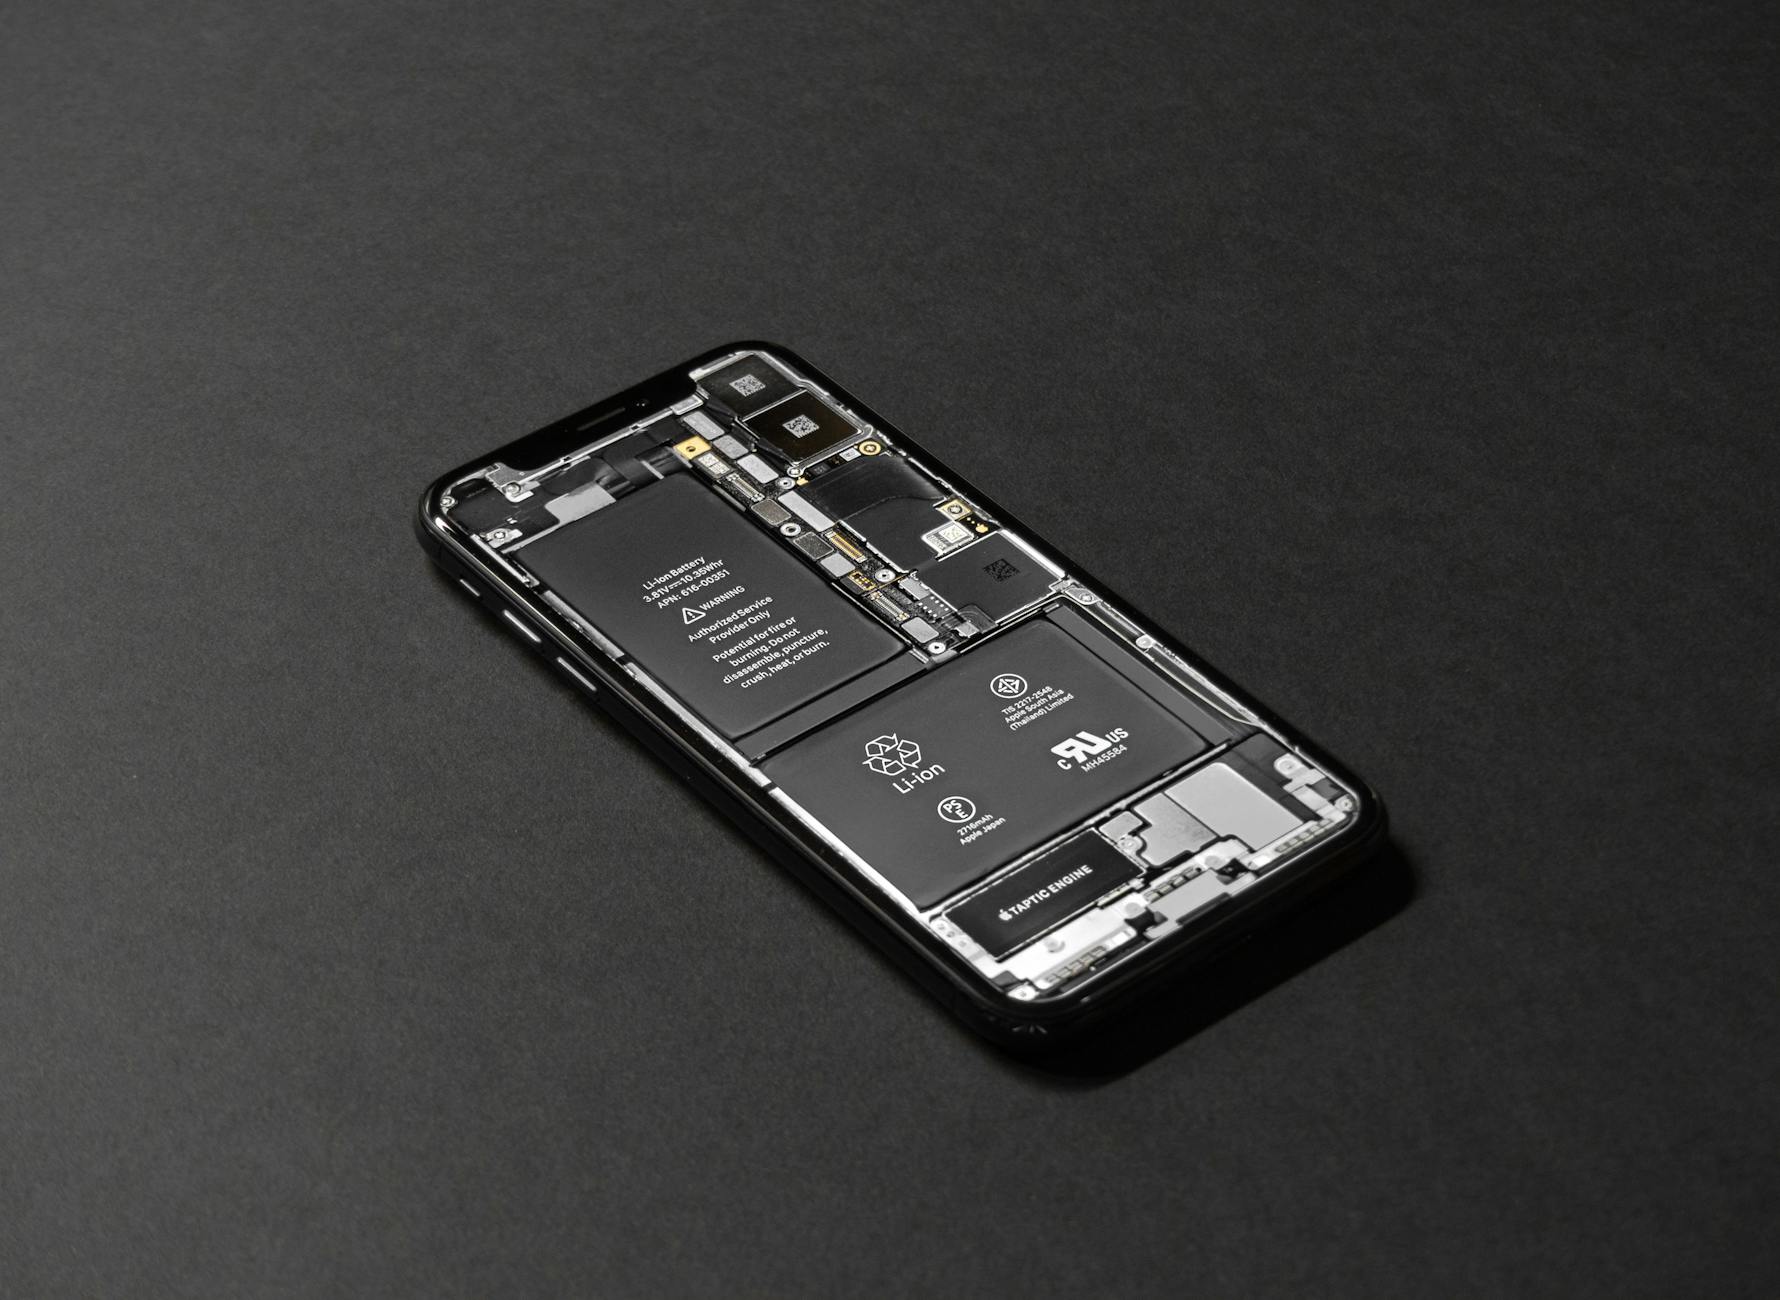
Troubleshooting and Replacing Dead Phone or Tablet Batteries (Top 5 Common Electronic Repairs)
Smartphones and tablets are essential tools for many households. When their batteries fail, it leads to unexpected shutdowns and lost productivity. Knowing how to identify battery issues, select proper replacements, and switch batteries safely can extend a device’s life. The steps below will help you address typical battery failures at home and restore dependable device function.
Recognizing Signs of Battery Failure
Dead or deteriorating batteries present clear symptoms:
- The device powers off unexpectedly, even when it reports a charge.
- Battery percentage drops rapidly or jumps between levels.
- Phones or tablets feel warmer than normal, even during light use.
- The device only turns on when plugged into a charger.
- Swelling or deformation appears at the back of the device.
If you recognize any of these problems, verify the battery’s health. iPhones display battery status in Settings > Battery > Battery Health. For Android devices, several third-party apps can measure capacity and charging performance. A battery health rating below 80% often means it’s time to plan a replacement. For more on this, the guide on when to consider battery replacement covers signs you should not ignore.
Choosing a Compatible Replacement
Replacing a failing battery requires a model matched to your device. Manufacturers stamp specific model numbers onto the battery or list them in the user manual. For older devices, batteries can be ordered online using this number. Select reputable brands and avoid low-cost, generic options that may not meet safety standards.
In cases where a device is still under warranty or manufacturer support, compare costs for official and third-party options. Some batteries for sealed devices are not sold directly; if authentic parts are needed, consider trusted retailers or repair services.
Gathering Recommended Tools
Most smartphones and tablets require specialized tools to open the device safely. Recommended tools include:
- Precision screwdrivers that fit device-specific screws (often Phillips or pentalobe types).
- Plastic opening tools or picks to avoid scratching surfaces.
- Suction cups for lifting screens or back covers.
- Tweezers for handling small connectors and screws.
- Anti-static wrist strap to reduce the risk of damaging sensitive components.
A prepared workspace and proper tools reduce repair difficulty and risk of damage. Avoid makeshift tools, as these increase the chance of accidental slips or device cracking.
Safely Removing and Replacing the Battery
Follow these step-by-step instructions to switch batteries safely:
- Power off the device completely and disconnect it from chargers or accessories.
- Remove screws and open the case using plastic tools and a suction cup if needed. Be patient and apply gentle, steady pressure; forcing parts may break clips or connectors.
- Identify and carefully detach the battery connector. Some adhesives hold batteries in place. In these cases, methods like dental floss or isopropyl alcohol can help separate the battery without puncturing it, as described in this removal technique.
- Inspect the old battery for damage or swelling. Dispose of old batteries at a recycling facility; do not throw them into household trash.
- Insert the new battery, secure the connector, and reassemble the device carefully. Ensure all seals and screws are back in place to prevent dust or moisture intrusion.
- Power on the device and check that it charges and reports battery status correctly.
Battery replacement complexity varies by device model. Some models have glued screens or delicate cables; do not attempt repairs on devices beyond your skill level. If you encounter resistance or uncertainty, step back and review detailed repair guides such as those available at Android Authority’s battery replacement article or Consumer Reports’ advice on smartphone batteries.
Replacing a dead battery is possible with care and proper preparation. This keeps home devices in service and reduces unnecessary electronic waste.
Fixing Broken Headphone Jacks or Worn Audio Cables (Top 5 Common Electronic Repairs)

Headphone jacks and audio cables are prone to wear, often resulting in crackling, signal loss, or complete failure. Fixing these problems at home requires precision, patience, and a willingness to follow basic repair steps. Proper handling will restore audio performance and add years to your headphones or auxiliary cables.
Identifying Audio Cable and Jack Issues
Pinpointing the source of the problem is essential. Physical cable damage, such as exposed wires or kinks, leads to intermittent sound or total audio loss. A loose or bent headphone plug can also cause channel imbalance. Frequently, issues develop near the plug or where the cable meets the headphones due to persistent bending.
- Listen for static, crackling, or dropouts when moving the cable.
- Observe where the insulation shows fraying, stiffness, or discoloration.
- Test the headphones on different devices to rule out faulty ports.
If the issue consistently appears with one pair and improves when wiggling the wire near the jack, a cable fault is likely. If not, the device’s headphone port may be damaged. For tips on these early checks, see this step-by-step resource on how to repair a headphone jack.
Tools and Materials Needed
Select the correct tools for a well-controlled repair. Basic solutions usually require:
- Precision wire cutters and strippers
- Soldering iron and fine solder
- Heat shrink tubing (various diameters)
- Multimeter (optional, for testing continuity)
- Replacement headphone jack plug (3.5mm or 6.3mm, matching your device)
- Tweezers or needle-nose pliers
- Electrical tape
Having these tools organized and within reach prevents errors and streamlines the process.
Step-by-Step Cable Repair and Soldering
A focused, step-driven process minimizes risk of damaging audio components. Begin with preparation and safety.
- Prepare the Area
Work on a stable surface with ample lighting. Disconnect headphones from all audio devices. - Cut and Strip Damaged Ends
Using wire cutters, remove the worn jack and a short section of damaged cable. Carefully strip back 1–2 cm of the outer insulation to reveal the colored wires (often red, green, gold, or blue). - Sort and Prepare Wires
Separate the ground wire (usually copper) from left and right channel wires. Gently twist the wire strands for organization. - Slide Heat Shrink Tubing In Place
Before soldering, slide appropriately sized heat shrink tubing over the cable. This will protect your repair after completion. - Tin the Wires and Jack Contacts
Use the soldering iron to “tin” the wires and contacts—applying a small amount of solder. This step makes it easier to join the wires securely. - Solder Each Connection
Solder each colored wire to its corresponding terminal on the new jack. Match left (often blue or green), right (red), and ground. Prevent solder bridges by allowing each connection to cool before the next. - Insulate and Protect
Slide the heat shrink tubing over each soldered joint and shrink with a heat source. For added durability, use electrical tape to reinforce the repair. - Test the Repair
Connect the headphones to an audio device. Play audio and flex the cable gently at the repair site. If sound remains clear, the connection is secure.
When working on a soldered headphone connection, patience is important. Overheating can melt insulation or damage the plug. Illustrated instructions are available in this detailed walkthrough on how to fix a broken headphone jack.
Improving Longevity and Preventing Future Damage
Proper cable management and gentle handling preserve both cables and connectors.
- Store headphones with the cable loosely coiled.
- Do not pull or sharply bend cables near plugs.
- Use protective cases to guard against kinks and pressure during storage or travel.
Regular care not only extends the lifespan of audio accessories but improves long-term performance. Users can also review advice on maximizing headphone performance and troubleshooting common audio faults by reading the guide to fixing malfunctioning AirPods for related tips on wired and wireless audio troubleshooting.
Addressing worn audio cables at home is practical with basic skills and equipment. Following a methodical approach ensures repairs are safe, durable, and effective.
Repairing Unresponsive TV Remotes and Game Controllers (Top 5 Common Electronic Repairs)

TV remotes and gaming controllers are two of the most frequently used electronic devices in the home. Their small size and frequent handling make them prone to faults, including responsiveness issues, stuck or worn-out buttons, and corroded battery terminals. Addressing these faults can extend the functional life of these controls without the need for professional repair or full replacement.
Safely Opening Your Device
Preparation is key before disassembling a remote or controller. Place the device on a stable, uncluttered surface and ensure it is powered down or removed from operation. For remotes, take out the batteries. For controllers, remove rechargeable packs if applicable.
Many remotes require a small Phillips screwdriver to detach back covers; others use clips that can be gently pried open with a plastic spudger or a flat tool. When opening, work slowly to avoid damaging internal plastic clips or circuit boards.
For assistance specific to remote disassembly, reliable step-by-step guidance is available at Fix an Unresponsive Remote Control. For game controllers, reference Game Controller Repair Help for breakdowns of common models.
Cleaning Battery Terminals
Corroded or dirty battery terminals often lead to intermittent power or complete device failure. White or greenish residue inside the battery compartment indicates corrosion, typically caused by leaked alkaline batteries. Resolve these faults in a few steps:
- Remove batteries and set them aside for disposal according to local regulations.
- Lightly dampen a cotton swab with isopropyl alcohol (at least 70%).
- Gently clean the terminals, removing any corrosion or debris.
- For severe residue, use a pencil eraser or a small amount of baking soda paste. Avoid using excessive liquid.
- Allow terminals to air dry completely before reinserting batteries.
This process restores electrical contact, allowing the device to power on reliably.
Replacing Sticky or Worn-Out Buttons
Buttons often become unresponsive due to dirt, spills, or worn conductive pads. Signs include delayed or missed inputs and buttons that feel stuck. To repair:
- Disassemble the device to access the rubber membrane and circuit board.
- Soak the rubber button pad in warm, soapy water for several minutes, then rinse and dry completely.
- Clean the exposed contact points on the circuit board with isopropyl alcohol.
- For worn contacts, apply a small amount of conductive paint or graphite from a pencil to the pads.
After cleaning and drying, reassemble the device carefully. Consistent button performance is restored by this maintenance. More advanced care for persistent faults is covered at Fix Any Video Game Controller.
Addressing PCB Contact Issues
The printed circuit board (PCB) inside remotes and controllers can experience connectivity problems due to dust, residue, or micro-cracks. Minor contact failures may cause specific buttons or entire rows to stop working.
Take these steps:
- Inspect the circuit board with a magnifier for dirt, dust, or signs of corrosion.
- Clean the board by gently wiping it with a lint-free cloth and isopropyl alcohol.
- Check for cracked solder joints, especially at battery terminals and button pads.
- If cracks are found and you have soldering skills, reflow problematic joints with a soldering iron. If not, consider consultation or targeted guides such as Troubleshooting a non-responsive TV Remote.
When completed with care, these repairs often restore full function and responsiveness.
When to Replace or Upgrade
Despite thorough repairs, some devices show persistent faults due to failed primary components or damaged receivers. In these cases, replacement may be the only practical solution. For universal remote compatibility or standards for controller replacement, consult manufacturer guidance or support communities such as r/ControllerRepair. This reduces troubleshooting time and prevents unnecessary frustration.
Routine attention prevents many common issues and builds lasting reliability into daily technology use. Basic maintenance extends device service life and minimizes household inconvenience. For more tips about maintaining small electronics and home gadgets, see this resource on preventing wear and recognizing when to upgrade your essential tech at how to clean and fix sticky electronics.
Simple Power Supply and Charger Repairs (Top 5 Common Electronic Repairs)

Power supplies and chargers are essential for many small devices and appliances at home. Problems often present as complete device failure, intermittent power, or visible cord damage. Many basic faults can be diagnosed and repaired with attention, patience, and an understanding of safety guidelines. Focus on simple steps, use the right tools, and respect the hazards of working with mains and high-voltage circuits. With careful inspection and appropriate handling, household users can resolve the most common issues.
Diagnosing Faulty Power Adapters
When a device stops charging or fails to power on, the power supply or adapter is often at fault. Begin diagnosis by confirming that the outlet works. Test the device with another compatible adapter if available. Visual inspection is also valuable—look for burn marks, swollen areas, or odor from the supply. Unplug the adapter before handling.
Power supplies can sometimes show external clues hinting at internal failure, like loose parts inside the housing or obvious melting. Be wary of continuing use if physical or thermal damage is visible, as unsafe adapters may pose a fire risk. Guides covering general safety advice for dealing with adapters can be found at Power Supply Safety Standards and Precautions.
Checking Power Cords for Damage
Power cords often break at stress points. Inspect along the entire length, especially near the ends, for any exposed wires, kinks, cuts, or fraying insulation. Damage to the cord can cause short circuits or unreliable charging.
To check, gently flex the cord while the adapter is unplugged. Cracks or breaks that reveal copper should be the focus of immediate repair or replacement. Do not tape over damaged wires as a permanent fix. Quality replacement cords are widely available online and offer a more reliable solution for continued use.
Repairing or Replacing Plugs and Fuses
If the adapter has a replaceable plug or fuse—common in many European-style plugs—inspect these components first. A blown fuse often leaves visible separation inside the glass, or dark deposits can be seen. Replace with the same rating as marked on the original component.
When replacing plugs, select units suited for the current and voltage of the device. Connect colored wires to the same positions as the old plug—matching live, neutral, and ground. Tighten terminals securely, avoiding loose connections. Use only approved replacements.
Testing Power Delivery
Once basic repairs or replacements are completed, test the adapter. Reconnect the cord securely; plug into a known working outlet. If you own a multimeter, measure the output voltage at the adapter’s plug and compare with specifications shown on the unit label. The voltage should fall within 5-10% of the rating.
Lightweight test devices—such as simple LED USB testers—also show if power is delivered to the cable. If readings fall outside expected ranges, further repair should stop. Inconsistent results or sparking during tests suggest deeper internal faults, which should not be handled without advanced knowledge.
Additional practical guidance on safe power supply repair procedures is outlined in this safe repair guide and the iFixit project safety resource.
Working Within Safe Limits
Only perform surface or plug-level repairs at home. Opening sealed adapters or power supplies exposes users to high-voltage capacitors that remain energized for minutes. Discharge procedures and insulation tests fall outside the safe scope for most households. For those interested in why, discussions on the safety of opening power supplies are shared in this summary from the electronics community at Reddit.
For more support on safely repairing household electronics and tips on organizing your repair area, consider related guidance, such as this helpful discussion of essential precautions before you begin.
Effective repair of power supplies and chargers at home centers on careful diagnosis, basic external repairs, and avoidance of complex internal faults. Consistent attention to safety ensures small household electronics remain both operational and safe for ongoing use.
Conclusion
Learning how to handle basic electronic repairs at home gives clear benefits. The approaches in this guide help address frequent device failures quickly and safely. Taking time to use the right tools and observe safety rules protects both people and property.
While many issues can be fixed with patience and method, not all repairs should be attempted without the needed skill or equipment. Knowing when to contact a professional is part of responsible repair practice. Approaching each task with caution and good preparation keeps devices functioning longer and prevents avoidable hazards.
Self-repair can also support a more sustainable home by reducing electronic waste and extending the life of everyday devices. For more advice on careful maintenance and recognizing when a device upgrade is necessary, visit the home electronics care resource at how to clean headphones from sweat, earwax, germs, and smell.
Thank you for reading. If you have tips or personal experiences with home repairs, consider sharing them to help others build their own skills.

![How to List Electronic Products on Amazon KDP in 2025 [Updated]](https://thespartane.com/wp-content/uploads/2025/04/how-to-list-electronic-products-amazon-kdp-2025-63e758b6-1-300x171.jpg)
![React JS Developer Tools: Essential Features and Best Practices for Efficient Development [Updated 2025]](https://thespartane.com/wp-content/uploads/2025/04/react-js-developer-coding-profile-2a536a90-300x171.jpg)


![Costco Food Court Menu Nutrition Facts and Healthier Choices [2025 Update]](https://thespartane.com/wp-content/uploads/2025/04/costco-food-court-menu-nutrition-2025-update-70a75690-300x171.jpg)
![Digital Products for Niche Software Developers [2025 Guide]](https://thespartane.com/wp-content/uploads/2025/04/1-300x171.jpg)