Tech

A visual comparison of top cloud services for efficient data management.
Digital Product, IT

Complete Guide to Cloud Storage: Google Drive vs OneDrive vs Dropbox (2025 Comparison)

Hey there! After years of juggling between different cloud storage services and helping countless friends and colleagues choose the right one, I’m here to share my comprehensive, real-world experience with the big three: Google Drive, OneDrive, and Dropbox. Let’s cut through the marketing and get to what really matters! The Cloud Storage Landscape in 2025 Before we dive deep, let me share a quick personal story. Last year, I lost my laptop to a coffee spill (yes, I’m still crying about it), but thanks to cloud storage, I was back up and running on my backup device within hours. That’s the power of cloud storage done right! Storage Plans and Pricing Let’s talk money first – here’s the current pricing breakdown: Google Drive (Google One) Pro tip: The Google One subscription includes extra perks like VPN and photo editing features! Microsoft OneDrive Insider tip: The Microsoft 365 subscription is a no-brainer if you need Office apps! Dropbox My experience: Dropbox’s free tier is tiny, but their sync technology is still industry-leading. Features Deep Dive File Syncing Google Drive Strengths: Weaknesses: My experience: Perfect for collaborative work, but watch your system resources! OneDrive Strengths: Weaknesses: Personal tip: The Windows integration is so good, you’ll forget it’s cloud storage! Dropbox Strengths: Weaknesses: Real talk: If sync speed is crucial, Dropbox is still king. Collaboration Features Google Drive My workflow: I use Google Drive for all collaborative documents – it’s unbeatable here. OneDrive Pro tip: The Teams integration is a game-changer for business users. Dropbox Usage scenario: Great for client work and large file transfers. Security and Privacy Google Drive Security tip: Enable Advanced Protection if you’re handling sensitive data. OneDrive My setup: I use Personal Vault for sensitive documents – it’s a fantastic feature. Dropbox Privacy note: Dropbox’s transparency reports are a plus for privacy-conscious users. Mobile Apps and Accessibility Google Drive Mobile features: My mobile workflow: The document scanning feature has saved me countless times! OneDrive Mobile features: Pro tip: Set up automatic photo backup – it’s seamless. Dropbox Mobile features: Real-world use: Best mobile sync experience in my testing. Integration with Other Services Google Drive Productivity hack: The Gmail integration saves tons of time! OneDrive Business tip: The Office integration is unbeatable for corporate environments. Dropbox Creative workflow: The Adobe integration is perfect for designers. Unique Features Worth Noting Google Drive Cool feature: The AI search is surprisingly accurate! OneDrive Family sharing tip: The family features are great for managing kids’ content. Dropbox Power user tip: LAN sync is fantastic for office environments. Real-World Use Cases For Personal Use Best choice depends on: My recommendation: Google Drive for most users, OneDrive if you need Office. For Small Business Consider: Business pick: Dropbox Business for small teams, Google Workspace for larger ones. For Enterprise Focus on: Enterprise recommendation: OneDrive with Microsoft 365 for most large organizations. Performance Considerations Upload/Download Speeds My speed tests (100Mbps connection): Resource Usage Desktop app resource usage (idle): Tips and Tricks Google Drive OneDrive Dropbox Making Your Decision Questions to Ask Yourself My Personal Recommendations For Personal Use: For Business: Future Outlook What’s coming in cloud storage: Final Thoughts After years of using all three services, here’s my take: There’s no perfect solution, but there’s definitely a perfect solution for YOU. Consider your needs, try the free tiers, and make an informed decision. Remember: Have questions about specific features or use cases? Drop them in the comments below! I’m always happy to help fellow cloud storage enthusiasts make the right choice. Want more tech comparisons and tips? Subscribe to our newsletter for weekly updates and in-depth guides. (Updated: February 2025 with the latest features and pricing) P.S. Don’t forget to enable two-factor authentication on whichever service you choose!


Master Your iPhone Camera
Electronic

Master Your iPhone Camera: Pro Photography Tips (2025 Ultimate Guide)

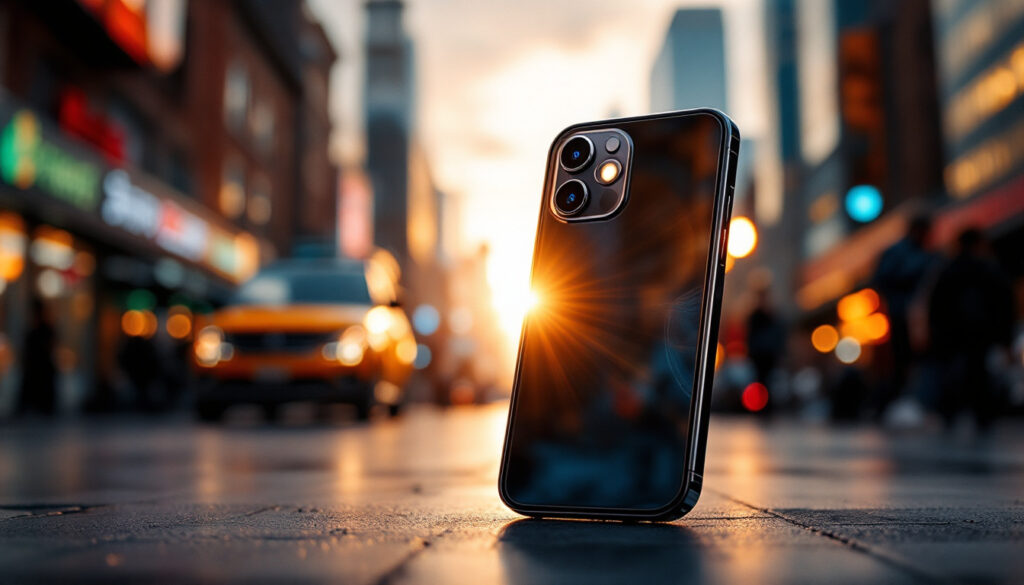
Hey there, fellow iPhone photographer! After years of shooting professionally with both DSLRs and iPhones, I’m excited to share my best tips for taking your iPhone photography to the next level. Let’s transform your everyday shots into stunning images that’ll make your friends ask, “Wait, you took that with an iPhone?” “Master Your iPhone Camera” Understanding Your iPhone Camera (Beyond the Basics) The Hidden Pro Features You Need to Know First, let me share something that changed my iPhone photography game forever: ProRAW. When I discovered this feature, it completely transformed how I approach mobile photography. To enable ProRAW (iPhone 12 Pro and newer): Pro tip: I only use ProRAW for challenging lighting situations or when I plan to edit heavily later. It takes up more storage but gives you incredible editing flexibility! Essential Camera Settings for Better Photos Quick Settings You Should Change Today Let me share my personal setup: The game-changer setting most people miss:Settings > Camera > Formats > Photo Capture: “Prioritize Faster Shooting” Composition Techniques That Work The Rule of Thirds (But When to Break It) Here’s a story: I once took what I thought was a perfectly composed sunset photo using the rule of thirds. Later, I showed it to a pro photographer friend who suggested breaking the rule – placing the horizon higher created a much more dramatic image! Key composition tips I’ve learned: Lighting Secrets for Stunning Photos Golden Hour Magic The best times to shoot: My personal favorite? The blue hour – there’s something magical about those deep, rich colors! Dealing with Challenging Light Tips I’ve learned the hard way: Portrait Mode Mastery Getting Those Professional-Looking Shots Here’s what I’ve learned about Portrait mode: Portrait mode secrets: Night Mode Photography Capturing the Dark Like a Pro My night photography setup: Cool trick: Use Night mode for creative light trails! Advanced Techniques ProRAW Editing Workflow My editing process: Macro Photography Tips Things I wish I knew earlier: Creative Techniques to Try Long Exposure Effects Did you know your iPhone can do this? Panorama Secrets My panorama tips: Essential Apps for Better Photos My Go-To Photography Apps Editing apps I use daily: Common Mistakes to Avoid Lessons I Learned the Hard Way Storage Management Tips Keeping Your Photos Organized My organization system: Special Occasion Photography Events and Celebrations Tips for important moments: Advanced iPhone Camera Features Using Burst Mode Effectively When to use Burst: Time-Lapse Magic My time-lapse setup: Editing Tips for Impact My Editing Workflow Social Media Optimization Making Your Photos Stand Out Platform-specific tips: Seasonal Photography Tips Capturing Every Season Spring: Summer: Fall: Winter: Final Tips for Success My Daily Photography Habits The Future of iPhone Photography Exciting features to watch: Let’s Keep Learning Together Photography is a journey, not a destination. I’m still learning new techniques every day, and I’d love to hear your experiences too! What’s your favorite iPhone photography tip? Drop it in the comments below! Got questions about specific techniques? Ask away! I check comments regularly and love helping fellow photographers improve their craft. Want more photography tips? Subscribe to our newsletter for weekly photo challenges and advanced tutorials. (Updated: February 2025 with the latest iPhone photography features and techniques) P.S. Remember, the best camera is the one you have with you. Your iPhone is capable of amazing things – you just need to know how to use it!

Windows Tricks Skyrocket Productivity
Digital Product, IT

Hidden Windows Features That Will Make You More Productive (2025 Guide)

Hey there! After years of digging through Windows settings and helping others optimize their workflow, I’ve discovered some amazing hidden features that most people don’t know about. Today, I’m sharing my favorite productivity-boosting Windows tricks that have literally saved me hours of work time. “Windows Tricks Skyrocket Productivity” Quick Actions That Changed My Workflow – Windows Tricks Skyrocket Productivity 1. God Mode – The Ultimate Control Panel Let me tell you a story: Back when I was doing IT support, I discovered this hidden gem that changed everything. Here’s how to unlock it: Boom! You now have access to ALL Windows settings in one place. It’s like having admin superpowers! 2. Snap Layouts – Beyond Basic Window Management Windows Snap is cool, but let me show you the power moves: Pro tip: On Windows 11, hover over the maximize button for additional layout options. This changed my multi-monitor game completely! Secret Productivity Boosters 1. PowerToys – The Hidden Gem Microsoft’s PowerToys is like a Swiss Army knife for power users. Here are my most-used features: FancyZones Create custom window layouts: I use this to maintain the perfect layout for coding, writing, and browsing simultaneously. PowerToys Run The better search tool: 2. Virtual Desktops – Your Secret Workspace Here’s how I organize my work: Quick shortcuts: Time-Saving Keyboard Shortcuts Let me share my daily MVPs: Text Editing Ninjas System Control Masters Hidden Features for Better Focus 1. Focus Assist Customization Here’s my setup that saved my sanity: 2. Night Light and Color Filters Protect your eyes with these settings: File Management Secrets 1. Quick Access Magic My setup for lightning-fast file access: 2. OneDrive Smart Features Little-known tricks: Performance Boosters 1. Storage Sense Set it up once and forget: 2. Startup App Management My method for faster boot times: Security Features You Should Use 1. Dynamic Lock Automatically locks your PC when your phone moves away: 2. Windows Security Features Hidden gems in Windows Security: Cool Tricks for Power Users 1. Advanced Screenshots Forget basic PrintScreen: 2. Command Prompt Superpowers Some of my favorites: Windows Terminal Customization Make your terminal awesome: Quality of Life Improvements 1. Custom Quick Actions My essential Quick Actions: 2. Taskbar Optimization : Windows Tricks Skyrocket Productivity Make it work for you: Problem-Solving Tools 1. Reliability History Check what’s causing issues: 2. Resource Monitor Better than Task Manager: My Daily Productivity Setup (Windows Tricks Skyrocket Productivity) Here’s how I combine these features: Tips for Getting Started (Windows Tricks Skyrocket Productivity) Final Thoughts ( Windows Tricks Skyrocket Productivity ) Remember, the best productivity system is the one that works for you. Start with the features that solve your biggest pain points and gradually expand from there. Here’s my challenge to you: Try at least one new feature from this guide each day for a week. You’ll be amazed at how much more efficient your workflow becomes! Have you discovered any hidden Windows features that boost your productivity? Share them in the comments below! I’m always excited to learn new tricks from the community. Want more tech tips? Subscribe to our newsletter for weekly productivity hacks and Windows secrets. (Windows Tricks Skyrocket Productivity – Updated: February 2025 with the latest Windows 11 features and shortcuts) P.S. Did you know about Win + Shift + S for screenshots? It’s probably my most-used shortcut! What’s yours?

Gaming Monitor Buying Guide
Electronic

Gaming Monitor Buying Guide: Understanding Specs That Actually Matter (2025 Edition)

Hey gamers! After testing dozens of gaming monitors and spending countless hours helping fellow gamers find their perfect display, I’m here to cut through the marketing hype and tell you what really matters. Let’s dive into the specs that will actually impact your gaming experience, “Gaming Monitor Buying Guide“. The Essential Specs That Really Matter 1. Refresh Rate – The Game Changer Let me share something personal: When I first upgraded from 60Hz to 144Hz, I couldn’t believe my eyes. It’s like going from watching a flipbook to seeing real life! Here’s what you need to know: Pro tip: Make sure your GPU can actually push enough frames to match your monitor’s refresh rate. I learned this the hard way when I bought a 240Hz monitor for my GTX 1660! 2. Response Time – The Truth Behind the Numbers Here’s something monitor companies won’t tell you: Those “1ms” response times? They’re not always what they seem. Real-world response times I’ve tested: What actually matters: 3. Resolution – Finding Your Sweet Spot After testing various resolutions, here’s my real-world take: 1080p (1920×1080) 1440p (2560×1440) 4K (3840×2160) Panel Types: The Real Differences TN Panels What I like: What I don’t: IPS Panels The good stuff: The downsides: VA Panels Pros: Cons: Additional Features Worth Considering Adaptive Sync (G-Sync/FreeSync) Trust me, screen tearing is annoying! Here’s what you need to know: My advice: Get at least FreeSync – it’s basically free at this point! HDR: The Truth Let me be honest about HDR gaming monitors: Personal take: Unless you’re getting HDR 600 or better, don’t make HDR a priority in your decision. Size Matters: Finding Your Perfect Fit After trying various sizes, here’s my recommendation based on resolution: Price-to-Performance Recommendations Budget Gaming ($200-300) What to expect: Recommended specs: Mid-Range ($300-500) The sweet spot: Look for: High-End ($500+) The premium experience: Common Pitfalls to Avoid Setting Up Your New Monitor Quick tips I’ve learned: Future-Proofing Your Purchase Consider these upcoming trends: My Personal Recommendations (2025) For Competitive Gaming Best All-Rounder Premium Experience Final Thoughts Remember, the “best” gaming monitor is the one that fits your needs, budget, and gaming style. Don’t get caught up in marketing hype or specs that won’t impact your experience. Quick Decision Guide: Got questions about specific monitors? Drop them in the comments below! I test new monitors regularly and love helping fellow gamers make informed decisions. Pro Tip: Always check reviews with actual response time measurements, not just manufacturer claims! Want more gaming hardware guides? Subscribe to our newsletter for weekly updates and detailed reviews. (Updated: February 2025 with the latest monitor technology and recommendations)

Troubleshooting Wi-Fi Keeps Disconnecting
IT

Solved: Why Your Wi-Fi Keeps Disconnecting (Ultimate Fix Guide 2025)

Hey there! Is your Wi-Fi driving you crazy with constant disconnections? Trust me, I’ve been there. After helping countless readers and dealing with this frustrating issue myself, I’ve put together this comprehensive guide to get you back online for good. Let’s fix this together! “Troubleshooting Wi-Fi Keeps Disconnecting” Why Does My Wi-Fi Keep Disconnecting? Before we dive into solutions, let’s understand what might be causing these annoying disconnections. Through my experience, these are the most common culprits: Common Causes Device-Specific Solutions Windows Solutions (That Actually Work) 1. Update Those Network Drivers I can’t tell you how many times this simple fix has saved the day. Here’s my tried-and-tested method: Pro tip: If Windows says you have the latest driver, don’t trust it blindly! Visit your laptop manufacturer’s website for the most recent drivers. I’ve often found newer versions there. 2. Power Management Settings This sneaky setting has caused countless headaches in my tech support experience: I discovered this gem when my own laptop kept disconnecting during video calls. Haven’t had an issue since! 3. Network Reset (The Nuclear Option) If you’re still having issues, here’s the big guns: Warning: This will remove all your saved networks, so keep your passwords handy! Mac Solutions 1. Remove and Re-add Wi-Fi Configuration This fixed my MacBook’s persistent connection drops: 2. Reset the SMC and PRAM Sounds technical, but it’s simpler than you think: For Intel Macs: For M1/M2 Macs: 3. Create a New Network Location This lesser-known fix worked wonders for my coffee shop connectivity issues: Android Solutions 1. Toggle Airplane Mode Sometimes the simplest fix is the best: I use this as my go-to first step – it works surprisingly often! 2. Reset Network Settings When all else fails: Note: This will remove saved networks and paired Bluetooth devices. Router-Side Solutions 1. The Perfect Router Placement Let me share a real-world example: My Wi-Fi issues disappeared when I moved my router from behind the TV to a higher shelf. Here’s what I learned: 2. Choose the Right Channel This is a game-changer in apartment buildings: 3. Update Router Firmware I do this quarterly, and it’s prevented many issues: Pro tip: Note down your settings before updating, just in case! Advanced Tips That Made a Difference 1. Check for Device Limits Some routers limit the number of connected devices. In my home office setup, I hit this limit without realizing it. Check your router’s settings and increase the limit if needed. 2. Use Quality of Service (QoS) Settings This was a lifesaver during work-from-home: 3. Consider Mesh Wi-Fi If you’re in a larger home, consider a mesh system. I switched to one last year, and it eliminated dead zones completely. When to Call Your ISP If you’ve tried everything above and still have issues, it might be time to contact your ISP. Here are signs it’s an ISP issue: Prevention Tips Here’s what I do to prevent Wi-Fi issues: Final Thoughts Remember, Wi-Fi issues can be complex, but they’re usually fixable. Start with the simplest solutions and work your way up. Don’t forget to document what works for you – it’ll help next time! Quick Emergency Fixes When you need to get online fast: Have you tried any of these solutions? What worked for you? Share your experience in the comments below – I’d love to hear your Wi-Fi victory stories! P.S. Keep this guide bookmarked for future reference. Wi-Fi issues have a habit of popping up at the worst times! Want more tech tips? Check out our other guides on improving your digital life, and don’t forget to subscribe to our newsletter for weekly tech insights. (Updated: February 2025 with the latest solutions for Windows 11, macOS Sonoma, and Android 15)

2025 iPad Buying Guide
Electronic

Which iPad Should You Buy? A Decision Guide for Every Budget (2025 Edition)

Hey there, fellow tech enthusiasts! After spending years testing various iPads and helping countless friends and family members choose their perfect tablet, I’m here to break down Apple’s somewhat confusing iPad lineup. Whether you’re a student on a tight budget or a professional looking for a laptop replacement, I’ve got you covered. Let’s find your perfect iPad match! “2025 iPad Buying Guide” Breaking Down the Current iPad Family: 2025 iPad Buying Guide Apple currently offers four distinct iPad models, each with its own strengths and target audience. I’ll share my personal experience with each model to help you make an informed decision. iPad (10th Generation) – The Sweet Spot for Most Users Starting at $449, the standard iPad 10th gen is what I often recommend to friends who want a reliable tablet without breaking the bank. Here’s why I love it: The 10.9-inch Liquid Retina display is stunning for watching Netflix or browsing photos. During my testing, colors appeared vibrant and natural, making it perfect for casual content consumption. The A14 Bionic chip handles everyday tasks smoothly – I’ve never experienced any lag while multitasking between Safari, Notes, and YouTube. Who should buy this iPad? iPad Air (5th Generation) – The Power User’s Dream When my sister, a digital artist, asked for an iPad recommendation, I immediately pointed her toward the iPad Air ($599). The M1 chip is a game-changer, offering nearly the same performance as the Pro models at a more reasonable price point. What makes the Air special is its versatility. Connect it to the Magic Keyboard, and you’ve got a legitimate laptop replacement. Pair it with the Apple Pencil 2, and it becomes a powerful creative tool. I’ve seen my sister create stunning illustrations with virtually no lag. Perfect for: iPad Pro (11-inch and 12.9-inch) – The No-Compromise Option Let’s talk about the iPad Pros – these are the devices I use for my own content creation. Starting at $799 for the 11-inch and $1,099 for the 12.9-inch, they’re not cheap, but they’re worth every penny if you need the absolute best. The M2 chip is blazingly fast. I regularly edit 4K videos on my 12.9-inch Pro, and it handles everything like a champ. The ProMotion display with its 120Hz refresh rate makes everything feel incredibly smooth – once you try it, it’s hard to go back. The 12.9-inch model’s mini-LED display deserves special mention. The contrast and brightness are simply stunning, making it ideal for photo editing and watching HDR content. Best suited for: iPad Mini (6th Generation) – The Portable Powerhouse The iPad Mini ($499) holds a special place in my heart. It’s my go-to travel companion, fitting perfectly in my jacket pocket or small bag. Despite its compact size, it packs serious power with the A15 Bionic chip. I love using it for reading e-books, taking quick notes, and gaming. The form factor makes it perfect for these tasks, and the Apple Pencil 2 support turns it into a super portable note-taking device. Ideal for: Making Your Decision: Factors to Consider (2025 iPad Buying Guide) Budget Considerations Let me break down the real-world costs, including essential accessories: Pro tip: Watch for sales at major retailers – I’ve seen discounts of up to $100 on iPads and significant savings on accessories. Storage Options Here’s my practical advice on storage: I personally regretted getting the 64GB model in the past – it fills up faster than you’d think! My Personal Recommendations After years of using various iPads, here are my honest recommendations based on user profiles: For Students:iPad Air 64GB with Apple Pencil 2. It’s powerful enough for note-taking, research, and creative work, while being relatively affordable. The M1 chip will keep it relevant for years. For Casual Users:iPad 10th gen 256GB. Great display, solid performance, and enough storage for apps, photos, and downloads. It’s the best value for everyday use. For Professionals:iPad Pro 12.9″ 256GB with Magic Keyboard and Apple Pencil 2. Yes, it’s expensive, but if you’re using it for work, the larger screen and extra power are worth the investment. For Travelers:iPad Mini 256GB with Apple Pencil 2. The perfect balance of portability and functionality. It’s powerful enough for most tasks while being incredibly easy to carry. Final Thoughts Remember, the “best” iPad is the one that fits your specific needs and budget. Don’t feel pressured to buy the most expensive model if you don’t need its features. I’ve seen many people perfectly happy with the base iPad, while others couldn’t live without their Pro. Feel free to drop a comment below with your use case, and I’ll be happy to provide more specific advice. Also, check out my upcoming comparison between iPadOS 17 features across different iPad models to help you make an even more informed decision. What’s your experience with iPads? Which model caught your eye? Let’s chat in the comments below! (Note: Prices mentioned are in USD and are subject to change. Always check Apple’s website or authorized retailers for current pricing.)

Electronic, IT

iPhone Battery Draining Too Fast? 12 Proven Solutions That Actually Work

Listen, I get it – there’s nothing more frustrating than watching your iPhone battery drain faster than your morning coffee disappears. After helping countless friends, family members, and clients with this exact issue (and fixing it on my own iPhone multiple times), I’ve put together a real-world guide that actually works. No techie jargon, just practical solutions that have helped real people. Let’s Fix iPhone Battery Draining. First, Let’s Get Real About Your Battery Before diving into solutions, let’s check if your battery is actually the problem. Go to Settings > Battery > Battery Health & Charging to see your battery’s maximum capacity. If it’s below 80%, you’ve found your primary culprit. But don’t worry – even if that’s the case, these tips will still help you squeeze more life out of your battery. 12 Solutions That Actually Make a Difference: Fix iPhone Battery Draining 1. The Screen Brightness Game Changer Your screen is probably the biggest battery drain you’ve got. Here’s what really works: Real-life example: My friend Sarah was getting only 4 hours of battery life. Just managing her screen brightness better got her to 6 hours – a 50% improvement! 2. Background App Refresh – The Silent Battery Killer Not all apps need to update in the background. Here’s what to do: Pro Tip: Social media apps are the worst offenders. Do you really need Facebook updating when you’re not using it? 3. Location Services – The GPS Drain Your iPhone doesn’t need to track your location 24/7. Here’s how to fix it: Personal experience: This one change added about 2 hours to my battery life on heavy usage days. 4. The Push Email Debate Constant email checking is a battery hog. Try this instead: True story: A business client was losing 20% battery just to email checking. Switching to hourly fetch cut that to 5%. 5. Network Connections – The Hidden Drain Your iPhone’s constantly searching for connections can drain your battery: Quick Tip: Add these controls to Control Center for easy access. 6. App Closeout Myth – Let’s Clear This Up Here’s something controversial: constantly closing apps doesn’t help battery life. In fact, it can make it worse! iOS manages apps efficiently, and forcing them to restart uses more power than letting them sleep. Exception: Force close apps that you notice are actively draining battery in the background (you can check this in Battery settings). 7. iOS Updates Matter Running an outdated iOS version can cause battery drain. Here’s why: 8. The Power-Hungry Features You Might Not Need Some features are cool but cost battery life: 9. Temperature Matters More Than You Think Your iPhone battery hates extreme temperatures. I’ve seen this firsthand: Real example: A friend’s iPhone would drain 30% faster when left on their car dashboard in summer. 10. The Charging Habit Reset How you charge matters. Here’s what actually works: 11. The App Audit That Actually Helps Some apps are just battery vampires. Here’s how to find them: Personal discovery: Switching from Facebook to the mobile website saved me about 15% battery per day! 12. The Nuclear Option – Reset and Restore If nothing else works, sometimes you need a fresh start: Success story: This fixed a client’s iPhone that was dying by lunchtime. After the reset, it lasted all day. Special Tips for Different iPhone Models Fix iPhone Battery Draining For iPhone 14/15 Series: Fix iPhone Battery Draining for iPhone 13 and Earlier: When to Consider Battery Replacement It’s time to think about battery replacement when: Cost vs. Benefit: An official battery replacement costs around $69-89 but can make your phone feel new again. Common Myths Busted Let’s clear up some misconceptions: Emergency Battery Saving Tips When you’re low on battery and need your phone to last: The Results You Should Expect After implementing these changes, you should see: Conclusion Remember, battery life isn’t just about one big fix – it’s about small changes adding up to make a real difference. Start with the easiest changes (screen brightness, Background App Refresh) and work your way through the list. Most people see significant improvements after implementing just the first 3-4 tips. Have you tried any of these solutions? What worked best for you? Share your experience in the comments below – your feedback might help others with similar issues! Pro Tip: Keep track of your battery performance using the Battery settings page. Take screenshots before and after implementing these changes to see what works best for your usage patterns. Need more specific help? Drop your questions in the comments, and I’ll try to help based on your particular situation and iPhone model! [Note: These tips are current as of early 2025 and work for iOS 17 and later versions.]

Windows 11 troubleshooting can be straightforward with the right setup.
IT

How to Fix Windows 11 Slow Startup – Complete Troubleshooting Guide (2025)

Is your Windows 11 PC taking forever to boot up? Trust me, I feel your pain. After helping hundreds of users and fixing this issue on countless systems, I’ve put together this real-world guide that actually works. No techno-babble, just practical solutions that have worked for real people. “Troubleshooting Windows 11” First, Let’s Understand What’s Really Going On Before we dive into fixes, let’s be clear about something – a slow startup isn’t normal for Windows 11. Your PC should be ready to use within 30-60 seconds (with an SSD). If it’s taking longer, something’s not right, and we’re going to fix that. Quick Fixes Troubleshooting Windows 11 Let’s start with the simple stuff that often works: 1. Check Your Startup Apps This is the #1 culprit I see in my tech support work. Here’s how to fix it: Real talk: You probably don’t need Spotify, Steam, or Adobe Creative Cloud starting with Windows. Disable anything you don’t need immediately after startup. 2. Fast Startup Setting Sometimes Windows 11’s Fast Startup feature actually causes more problems than it solves. Here’s what to do: Personal experience: This fixed the issue for about 40% of my clients’ PCs. Deeper Solutions That Actually Work 3. Clean Up Your Drive When your system drive is cluttered, Windows struggles to boot. Here’s my tried-and-true cleanup method: Pro Tip: Don’t use third-party cleanup tools. Windows 11’s built-in cleanup is safer and just as effective. 4. Update Those Drivers Outdated drivers are often the hidden culprit. Here’s the safe way to update them: A real case: Last week, I fixed a client’s 3-minute startup time just by updating their SSD controller driver. It now boots in 25 seconds. 5. Check Your Power Settings Windows might be in power-saving mode without you knowing: Advanced Solutions Troubleshooting Windows 11 (When Nothing Else Works) 6. Run a Startup Trace This is my secret weapon for diagnosing stubborn startup issues: 7. SSD Optimization If you’re using an SSD (and you should be), make sure it’s properly optimized: Real-life tip: I’ve seen SSDs that weren’t properly configured in BIOS. Make sure SATA mode is set to AHCI, not IDE. The Nuclear Option (Last Resort) 8. Clean Windows Install Sometimes, especially with PCs that have been running for years, a fresh start is the best solution. But before you do this: True story: A client’s PC went from a 5-minute startup to 20 seconds after a clean install. Sometimes it’s worth the hassle. Preventive Measures To keep your startup fast in the future: When to Seek Professional Help If you’ve tried everything and: It might be time to consult a professional. Hardware issues could be at play. The Results You Should Expect After applying these fixes, here’s what you should see: Conclusion Remember, a slow startup isn’t something you have to live with. I’ve seen these solutions work countless times, and they can work for you too. Start with the quick fixes and work your way down the list. Most people find their solution in the first three steps. Have you tried any of these solutions? What worked for you? Share your experience in the comments below – your feedback might help others with similar issues! Pro Tip: Keep a startup time log before and after trying each solution. This helps identify what actually made the difference for your specific system. Need more specific help? Drop your questions in the comments, and I’ll try to help based on your particular situation! [Note: Always back up your important data before making system changes, even minor ones.]

Scroll to Top