Author name: admin

Importance of Clean Code
IT

Why Clean Code Is Important and How You Can Maintain a Clean Code

The Importance of Clean Code refers to the practice of writing software that is easy to read, understand, and maintain. It emphasizes structured, readable, and efficient coding practices that reduce complexity and improve collaboration. As modern software systems grow increasingly intricate, clean code has become a fundamental requirement for developers aiming to produce high-quality, reliable software. By adopting clean code principles, we can enhance efficiency, simplify debugging, and improve overall software quality. Clean code makes it easier to locate and resolve issues, incorporate new features, and adapt to changing project requirements. This approach benefits both individual developers and teams, enabling smoother collaboration and a more robust final product. Why Is Clean Code Important? Importance of Clean Code offers several benefits that make it an essential part of software development. Key areas where clean code makes a difference include: Maintainability Maintaining software becomes much more manageable when the code is clean and well-organized. Clear and concise code reduces the time spent understanding code logic, making updates and modifications faster and more accurate. This minimizes the risk of introducing bugs during updates. Well-maintained code allows us to easily integrate new features or make optimizations without fear of unintended consequences. Importance of Clean Code also ensures continuity, allowing code to remain comprehensible across a project’s lifecycle, even when transferred between developers or teams. Collaboration Working on a shared codebase becomes significantly easier when using clean coding practices. Clear and consistent code makes it simpler for team members to understand and contribute, regardless of their prior involvement. This fosters an environment of productive collaboration, preventing confusion and reducing the likelihood of errors during teamwork. Clean coding also establishes consistency by adhering to standard practices. This shared foundation aligns team members, making the development process smoother and more efficient. Debugging Clean code simplifies the process of identifying and resolving issues. Logical structure, meaningful names, and clear comments make it easier to navigate and pinpoint the root cause of bugs. An easy-to-read codebase translates to faster bug fixes and a reduced risk of introducing new problems during corrections. By decreasing ambiguity and promoting clarity, we can significantly lower the time and effort needed to maintain error-free code. Efficiency While writing clean code may require extra effort upfront, it saves time and resources in the long run. A readable and structured codebase accelerates development by reducing the time spent deciphering logic. Adding new features or modifying existing ones becomes less cumbersome. Moreover, efficient debugging and reduced error rates make development processes more streamlined. This results in greater productivity, fewer delays, and a better overall experience for clients and developers alike. How to Maintain Clean Code (Importance of Clean Code)? Adopting clean code involves following established practices to ensure clarity, simplicity, and consistency. Here are key techniques we can use to maintain clean code: Use Descriptive Names Choosing descriptive names for variables, functions, and classes enhances code readability. When names reflect their purpose or content, it becomes easier to comprehend their role in the program. For instance, replacing a vague variable name like temp with productPrice immediately clarifies its context. Descriptive naming also reduces the likelihood of errors during updates since it eliminates guesswork. Clear naming conventions allow collaborators to understand the code quickly, improving both efficiency and teamwork. Keep Functions Small Functions should remain focused on a single task to keep the code simple and easy to follow. Smaller, more precise functions reduce complexity, making it easier to test, update, and debug. This approach minimizes the risk of creating redundant or overlapping functionalities. Compact functions promote reusability, allowing us to apply existing logic across different parts of a project. This reduces code duplication, resulting in a more streamlined codebase. Write Clear Comments While code should strive to be self-explanatory, comments serve as supplemental tools to clarify intent. Concise and meaningful comments can explain the purpose or reasoning behind particular decisions, helping us and others understand the code more easily. Comments should focus on why a segment of code exists rather than reiterating what it does. Outdated or excessive comments can create confusion, so it’s important to keep them accurate and relevant. Use Consistent Formatting Consistent formatting ensures that code is visually organized and easy to follow. By establishing and adhering to formatting standards—such as indentation, line length, and spacing—we create a codebase that feels logical and structured. Uniform formatting helps teams collaborate more effectively while also simplifying maintenance and debugging. Tools like linters or code formatters can help automate compliance with formatting standards, saving effort and time. Conclusion Clean code has become indispensable in today’s software development environment. It ensures that code is efficient, understandable, and scalable, benefiting both developers and end-users. By following key practices—such as descriptive naming, small functions, clear comments, and consistent formatting—we can create reliable software that is easier to maintain, collaborate on, and expand upon. Prioritizing clean code not only improves productivity but also elevates the quality of the final product. As technology evolves, mastering clean code principles enables us to develop robust and adaptable solutions that stand the test of time.

Clean Code Handbook
IT

How to Write Clean Code – Tips and Best Practices (Full Handbook)

Welcome! This guide focuses on writing clean code. When I started programming, the concept felt unclear, and I realized it has multiple interpretations. In this article, we’ll define clean code, explore why it matters, and discuss how to evaluate a codebase for cleanliness. You’ll also find practical tips and conventions to make your code clearer and more maintainable. “Clean Code Handbook” What Is Clean Code and Why Does It Matter? (Clean Code Handbook) Clean code is well-structured, easy to read, and simple to maintain. It avoids unnecessary complexity, follows agreed-upon standards, and minimizes redundancy. Clean code allows developers to quickly understand and modify it without confusion. Why care? Developers working with clean code are more productive and make fewer errors. Additionally, clean code ensures that projects can evolve over time, especially in long-term implementations. Improving code readability and maintainability reduces technical debt and facilitates collaboration. How to Evaluate a Codebase for Cleanliness To determine whether a codebase is clean, consider the following: Tools like linters and code formatters help identify issues, while code reviews and automated tests ensure code meets quality standards. Remember, perceptions of clean code can vary, but these general principles provide a reliable starting point. Tips for Writing Cleaner Code Focus on Effectiveness, Efficiency, and Simplicity Example: Efficiency in Practice The second example uses fewer lines and processes the array in one step, demonstrating cleaner and more efficient code. Formatting and Syntax Consistent formatting improves readability. Indentation, spacing, and syntax choices should align across the codebase. Adopt tools like Prettier or ESLint to enforce consistency automatically. Naming Conventions Use meaningful names for variables, functions, and classes. Avoid vague or abbreviated terms. Readable names improve maintainability, especially in collaborative projects. Balance Conciseness and Clarity While short code is often desirable, clarity should not be sacrificed. Aim for code that is both brief and understandable. Reusability Reusable code saves effort and fosters consistency. Write functions or modules that can serve multiple purposes. The second approach consolidates logic into one flexible function. Clear Flow of Execution Organize code to follow a logical sequence. Avoid mixing unrelated tasks in the same function. Breaking tasks into smaller functions improves readability and testing. Single Responsibility Principle Each function or class should handle one task. This reduces dependencies and enhances flexibility. Use a Single Source of Truth Avoid duplicating values or logic across files. Centralize repeated constants or configurations. This approach reduces errors and streamlines updates. Expose Only What’s Necessary Limit data exposure to what is needed for a specific task. This reduces risk and simplifies debugging. Modularization Divide code into smaller, self-contained components or modules. This improves scalability and reusability. Folder Structure A clean folder structure organizes code by features rather than file types. This improves navigation and reduces duplication. Example: Feature-based structure Documentation Document complex areas of your code thoroughly. Use inline comments and tools like JSDoc to provide clarity. Summary Clean code enhances collaboration and ensures long-term maintainability. By focusing on clarity, consistency, and simplicity, you can reduce errors and improve project efficiency. Applying the principles outlined here will help create code that is easy to understand, extend, and use.

Master SEO Powerhouses RankerFox
Digital Product

Mastering SEO for IT Professionals and Developers: How RankerFox Powers Success

Search engine optimization (SEO) has become an essential skill for IT professionals and developers striving to stand out in a competitive digital space. Effective SEO goes beyond keywords; it’s about building visibility, driving organic traffic, and ultimately achieving higher rankings that translate into results. For those navigating this technical terrain, leveraging the right tools can make all the difference. RankerFox serves as a practical solution, offering data-driven insights and strategies to optimize your efforts. With the right approach, SEO becomes less of a challenge and more of an advantage. “Master SEO Powerhouses RankerFox“ Fundamentals of SEO: Building the Right Framework Establishing a robust SEO framework is essential for any IT professional or developer looking to elevate their online presence. This foundation ensures that efforts in search optimization are both effective and sustainable. By focusing on the core pillars of keyword research, on-page strategies, and technical SEO, you can create a website that is both user-friendly and search-engine-ready. Keyword Research and Its Role in Traffic Generation Keyword research is the compass that guides your SEO strategy. For IT professionals and developers, precision is key. Identifying high-value keywords not only helps attract the right audience but also ensures that your content resonates with their specific needs. To find relevant keywords: A solid keyword strategy forms the backbone of your SEO plan, driving qualified traffic to your site while maintaining focus on niche segments. Photo by Kindel Media On-Page SEO: Optimizing Website Content and Structure On-page SEO involves fine-tuning your content and website structure to appeal to both users and search engines. It’s about ensuring that your site isn’t just packed with information but that the information is accessible, understandable, and relevant. Here’s how to handle on-page optimization effectively: Pay attention to your site’s code as well. Cut down on unnecessary scripts and ensure consistency in your CSS and HTML. Clean code doesn’t just improve SEO—it also eliminates potential barriers for developers revisiting the site in the future. Technical SEO: The Backbone of Search Engine Success While keyword research and on-page optimization address what users see, technical SEO lays the groundwork for how search engines interact with your site. Developers are in a unique position to influence this aspect, as it aligns directly with the website’s architecture and performance. Key areas to focus on include: By addressing these technical elements, you create a seamless experience for both users and search engines, laying the groundwork for improved visibility and performance. Exploring SEO Powerhouses: Tools That Change the Game The right tools make a significant difference in the effectiveness of your SEO strategy. IT professionals and developers increasingly rely on data-driven platforms to not only troubleshoot issues but also to unlock new opportunities for growth. From detailed search analytics to automation, these tools streamline processes and provide actionable insights. Google Search Console: Unveiling Search Insights Google Search Console (GSC) is a foundational tool that offers a direct look into how search engines understand and rank your website. Its robust interface and features empower developers to diagnose issues, optimize performance, and refine their strategies based on evidence rather than assumptions. Some actionable uses of GSC include: In addition, developers can submit a sitemap directly to Google through GSC, ensuring efficient crawling and optimum indexation of their pages. Photo by Pixabay SEMrush and Ahrefs: Advanced Data and Competitor Analysis For those delving deeper into optimization, SEMrush and Ahrefs are among the most trusted platforms for competitive analysis and strategy refinement. Professional users benefit from their exhaustive datasets and intuitive interfaces. Here’s how they stand out: These tools are comprehensive yet user-friendly, making them indispensable for those who want to go beyond basic analytics to refine advanced SEO strategies. RankerFox: Combining Automation and Insights RankerFox is another powerful resource tailored for IT audiences. While many tools focus solely on data retrieval, RankerFox excels in combining automation with actionable insights, enabling users to work smarter and faster. This makes it particularly effective for developers managing multiple tasks simultaneously. Key features of RankerFox include: What sets RankerFox apart is its user-friendly design and IT-centric approach. For developers, who often juggle tight deadlines, RankerFox simplifies complex processes and ensures insights are both timely and relevant. All three of these platforms—Google Search Console, SEMrush, Ahrefs, and RankerFox—equip users to tackle SEO with precision, whether the goal is diagnosing existing issues or identifying fresh opportunities to grow. The RankerFox Edge: Unlocking the Full Potential of SEO Strategies (Master SEO Powerhouses RankerFox) RankerFox has emerged as a powerful ally for developers and IT professionals looking to simplify and enhance their SEO efforts. By integrating advanced functionality with an intuitive interface, it bridges the gap between technical complexity and user accessibility. Whether you’re managing detailed content strategies or tracking progress across multiple campaigns, RankerFox delivers results by saving time and maximizing workflows. Let’s explore what gives this tool its edge. How RankerFox Simplifies Content Planning and Execution Content planning can be daunting without the right tools. Ensuring that keywords align with user intent, maintaining an optimal posting schedule, and tracking performance over time require meticulous effort. This is where RankerFox excels, providing seamless features that allow users to focus on strategy rather than logistics. RankerFox simplifies workflows with tools such as: When you’re juggling multiple responsibilities, having these features centralized in one platform cuts down wasted time and potential errors, ensuring every piece of content performs as intended. Photo by FreeBoilerGrants Master SEO Powerhouses RankerFox Automation and be Master SEO Powerhouses RankerFox Repetitive tasks like reporting, rank tracking, and competitor analysis can drain focus from more creative or strategic work. Automation is key to scaling SEO processes, especially for IT teams managing complex or multi-site operations. RankerFox offers robust automation tools to handle these tasks effortlessly. Here’s how it supports efficiency: For developers, this automation is invaluable. It allows them to reallocate time to core responsibilities, all while maintaining full visibility into SEO progress. Case Study: Real-World Success Stories Using RankerFox (Master SEO Powerhouses RankerFox) The true measure of any SEO tool lies in

A visual comparison of top cloud services for efficient data management.
Digital Product, IT

Complete Guide to Cloud Storage: Google Drive vs OneDrive vs Dropbox (2025 Comparison)

Hey there! After years of juggling between different cloud storage services and helping countless friends and colleagues choose the right one, I’m here to share my comprehensive, real-world experience with the big three: Google Drive, OneDrive, and Dropbox. Let’s cut through the marketing and get to what really matters! The Cloud Storage Landscape in 2025 Before we dive deep, let me share a quick personal story. Last year, I lost my laptop to a coffee spill (yes, I’m still crying about it), but thanks to cloud storage, I was back up and running on my backup device within hours. That’s the power of cloud storage done right! Storage Plans and Pricing Let’s talk money first – here’s the current pricing breakdown: Google Drive (Google One) Pro tip: The Google One subscription includes extra perks like VPN and photo editing features! Microsoft OneDrive Insider tip: The Microsoft 365 subscription is a no-brainer if you need Office apps! Dropbox My experience: Dropbox’s free tier is tiny, but their sync technology is still industry-leading. Features Deep Dive File Syncing Google Drive Strengths: Weaknesses: My experience: Perfect for collaborative work, but watch your system resources! OneDrive Strengths: Weaknesses: Personal tip: The Windows integration is so good, you’ll forget it’s cloud storage! Dropbox Strengths: Weaknesses: Real talk: If sync speed is crucial, Dropbox is still king. Collaboration Features Google Drive My workflow: I use Google Drive for all collaborative documents – it’s unbeatable here. OneDrive Pro tip: The Teams integration is a game-changer for business users. Dropbox Usage scenario: Great for client work and large file transfers. Security and Privacy Google Drive Security tip: Enable Advanced Protection if you’re handling sensitive data. OneDrive My setup: I use Personal Vault for sensitive documents – it’s a fantastic feature. Dropbox Privacy note: Dropbox’s transparency reports are a plus for privacy-conscious users. Mobile Apps and Accessibility Google Drive Mobile features: My mobile workflow: The document scanning feature has saved me countless times! OneDrive Mobile features: Pro tip: Set up automatic photo backup – it’s seamless. Dropbox Mobile features: Real-world use: Best mobile sync experience in my testing. Integration with Other Services Google Drive Productivity hack: The Gmail integration saves tons of time! OneDrive Business tip: The Office integration is unbeatable for corporate environments. Dropbox Creative workflow: The Adobe integration is perfect for designers. Unique Features Worth Noting Google Drive Cool feature: The AI search is surprisingly accurate! OneDrive Family sharing tip: The family features are great for managing kids’ content. Dropbox Power user tip: LAN sync is fantastic for office environments. Real-World Use Cases For Personal Use Best choice depends on: My recommendation: Google Drive for most users, OneDrive if you need Office. For Small Business Consider: Business pick: Dropbox Business for small teams, Google Workspace for larger ones. For Enterprise Focus on: Enterprise recommendation: OneDrive with Microsoft 365 for most large organizations. Performance Considerations Upload/Download Speeds My speed tests (100Mbps connection): Resource Usage Desktop app resource usage (idle): Tips and Tricks Google Drive OneDrive Dropbox Making Your Decision Questions to Ask Yourself My Personal Recommendations For Personal Use: For Business: Future Outlook What’s coming in cloud storage: Final Thoughts After years of using all three services, here’s my take: There’s no perfect solution, but there’s definitely a perfect solution for YOU. Consider your needs, try the free tiers, and make an informed decision. Remember: Have questions about specific features or use cases? Drop them in the comments below! I’m always happy to help fellow cloud storage enthusiasts make the right choice. Want more tech comparisons and tips? Subscribe to our newsletter for weekly updates and in-depth guides. (Updated: February 2025 with the latest features and pricing) P.S. Don’t forget to enable two-factor authentication on whichever service you choose!

Master Your iPhone Camera
Electronic

Master Your iPhone Camera: Pro Photography Tips (2025 Ultimate Guide)

Hey there, fellow iPhone photographer! After years of shooting professionally with both DSLRs and iPhones, I’m excited to share my best tips for taking your iPhone photography to the next level. Let’s transform your everyday shots into stunning images that’ll make your friends ask, “Wait, you took that with an iPhone?” “Master Your iPhone Camera” Understanding Your iPhone Camera (Beyond the Basics) The Hidden Pro Features You Need to Know First, let me share something that changed my iPhone photography game forever: ProRAW. When I discovered this feature, it completely transformed how I approach mobile photography. To enable ProRAW (iPhone 12 Pro and newer): Pro tip: I only use ProRAW for challenging lighting situations or when I plan to edit heavily later. It takes up more storage but gives you incredible editing flexibility! Essential Camera Settings for Better Photos Quick Settings You Should Change Today Let me share my personal setup: The game-changer setting most people miss:Settings > Camera > Formats > Photo Capture: “Prioritize Faster Shooting” Composition Techniques That Work The Rule of Thirds (But When to Break It) Here’s a story: I once took what I thought was a perfectly composed sunset photo using the rule of thirds. Later, I showed it to a pro photographer friend who suggested breaking the rule – placing the horizon higher created a much more dramatic image! Key composition tips I’ve learned: Lighting Secrets for Stunning Photos Golden Hour Magic The best times to shoot: My personal favorite? The blue hour – there’s something magical about those deep, rich colors! Dealing with Challenging Light Tips I’ve learned the hard way: Portrait Mode Mastery Getting Those Professional-Looking Shots Here’s what I’ve learned about Portrait mode: Portrait mode secrets: Night Mode Photography Capturing the Dark Like a Pro My night photography setup: Cool trick: Use Night mode for creative light trails! Advanced Techniques ProRAW Editing Workflow My editing process: Macro Photography Tips Things I wish I knew earlier: Creative Techniques to Try Long Exposure Effects Did you know your iPhone can do this? Panorama Secrets My panorama tips: Essential Apps for Better Photos My Go-To Photography Apps Editing apps I use daily: Common Mistakes to Avoid Lessons I Learned the Hard Way Storage Management Tips Keeping Your Photos Organized My organization system: Special Occasion Photography Events and Celebrations Tips for important moments: Advanced iPhone Camera Features Using Burst Mode Effectively When to use Burst: Time-Lapse Magic My time-lapse setup: Editing Tips for Impact My Editing Workflow Social Media Optimization Making Your Photos Stand Out Platform-specific tips: Seasonal Photography Tips Capturing Every Season Spring: Summer: Fall: Winter: Final Tips for Success My Daily Photography Habits The Future of iPhone Photography Exciting features to watch: Let’s Keep Learning Together Photography is a journey, not a destination. I’m still learning new techniques every day, and I’d love to hear your experiences too! What’s your favorite iPhone photography tip? Drop it in the comments below! Got questions about specific techniques? Ask away! I check comments regularly and love helping fellow photographers improve their craft. Want more photography tips? Subscribe to our newsletter for weekly photo challenges and advanced tutorials. (Updated: February 2025 with the latest iPhone photography features and techniques) P.S. Remember, the best camera is the one you have with you. Your iPhone is capable of amazing things – you just need to know how to use it!

Windows Tricks Skyrocket Productivity
Digital Product, IT

Hidden Windows Features That Will Make You More Productive (2025 Guide)

Hey there! After years of digging through Windows settings and helping others optimize their workflow, I’ve discovered some amazing hidden features that most people don’t know about. Today, I’m sharing my favorite productivity-boosting Windows tricks that have literally saved me hours of work time. “Windows Tricks Skyrocket Productivity” Quick Actions That Changed My Workflow – Windows Tricks Skyrocket Productivity 1. God Mode – The Ultimate Control Panel Let me tell you a story: Back when I was doing IT support, I discovered this hidden gem that changed everything. Here’s how to unlock it: Boom! You now have access to ALL Windows settings in one place. It’s like having admin superpowers! 2. Snap Layouts – Beyond Basic Window Management Windows Snap is cool, but let me show you the power moves: Pro tip: On Windows 11, hover over the maximize button for additional layout options. This changed my multi-monitor game completely! Secret Productivity Boosters 1. PowerToys – The Hidden Gem Microsoft’s PowerToys is like a Swiss Army knife for power users. Here are my most-used features: FancyZones Create custom window layouts: I use this to maintain the perfect layout for coding, writing, and browsing simultaneously. PowerToys Run The better search tool: 2. Virtual Desktops – Your Secret Workspace Here’s how I organize my work: Quick shortcuts: Time-Saving Keyboard Shortcuts Let me share my daily MVPs: Text Editing Ninjas System Control Masters Hidden Features for Better Focus 1. Focus Assist Customization Here’s my setup that saved my sanity: 2. Night Light and Color Filters Protect your eyes with these settings: File Management Secrets 1. Quick Access Magic My setup for lightning-fast file access: 2. OneDrive Smart Features Little-known tricks: Performance Boosters 1. Storage Sense Set it up once and forget: 2. Startup App Management My method for faster boot times: Security Features You Should Use 1. Dynamic Lock Automatically locks your PC when your phone moves away: 2. Windows Security Features Hidden gems in Windows Security: Cool Tricks for Power Users 1. Advanced Screenshots Forget basic PrintScreen: 2. Command Prompt Superpowers Some of my favorites: Windows Terminal Customization Make your terminal awesome: Quality of Life Improvements 1. Custom Quick Actions My essential Quick Actions: 2. Taskbar Optimization : Windows Tricks Skyrocket Productivity Make it work for you: Problem-Solving Tools 1. Reliability History Check what’s causing issues: 2. Resource Monitor Better than Task Manager: My Daily Productivity Setup (Windows Tricks Skyrocket Productivity) Here’s how I combine these features: Tips for Getting Started (Windows Tricks Skyrocket Productivity) Final Thoughts ( Windows Tricks Skyrocket Productivity ) Remember, the best productivity system is the one that works for you. Start with the features that solve your biggest pain points and gradually expand from there. Here’s my challenge to you: Try at least one new feature from this guide each day for a week. You’ll be amazed at how much more efficient your workflow becomes! Have you discovered any hidden Windows features that boost your productivity? Share them in the comments below! I’m always excited to learn new tricks from the community. Want more tech tips? Subscribe to our newsletter for weekly productivity hacks and Windows secrets. (Windows Tricks Skyrocket Productivity – Updated: February 2025 with the latest Windows 11 features and shortcuts) P.S. Did you know about Win + Shift + S for screenshots? It’s probably my most-used shortcut! What’s yours?

Gaming Monitor Buying Guide
Electronic

Gaming Monitor Buying Guide: Understanding Specs That Actually Matter (2025 Edition)

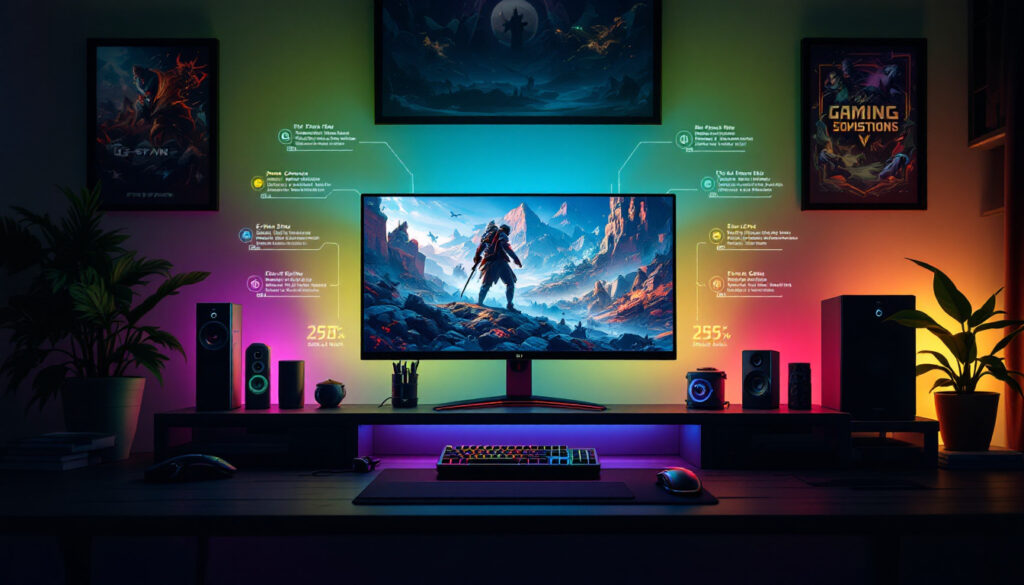
Hey gamers! After testing dozens of gaming monitors and spending countless hours helping fellow gamers find their perfect display, I’m here to cut through the marketing hype and tell you what really matters. Let’s dive into the specs that will actually impact your gaming experience, “Gaming Monitor Buying Guide“. The Essential Specs That Really Matter 1. Refresh Rate – The Game Changer Let me share something personal: When I first upgraded from 60Hz to 144Hz, I couldn’t believe my eyes. It’s like going from watching a flipbook to seeing real life! Here’s what you need to know: Pro tip: Make sure your GPU can actually push enough frames to match your monitor’s refresh rate. I learned this the hard way when I bought a 240Hz monitor for my GTX 1660! 2. Response Time – The Truth Behind the Numbers Here’s something monitor companies won’t tell you: Those “1ms” response times? They’re not always what they seem. Real-world response times I’ve tested: What actually matters: 3. Resolution – Finding Your Sweet Spot After testing various resolutions, here’s my real-world take: 1080p (1920×1080) 1440p (2560×1440) 4K (3840×2160) Panel Types: The Real Differences TN Panels What I like: What I don’t: IPS Panels The good stuff: The downsides: VA Panels Pros: Cons: Additional Features Worth Considering Adaptive Sync (G-Sync/FreeSync) Trust me, screen tearing is annoying! Here’s what you need to know: My advice: Get at least FreeSync – it’s basically free at this point! HDR: The Truth Let me be honest about HDR gaming monitors: Personal take: Unless you’re getting HDR 600 or better, don’t make HDR a priority in your decision. Size Matters: Finding Your Perfect Fit After trying various sizes, here’s my recommendation based on resolution: Price-to-Performance Recommendations Budget Gaming ($200-300) What to expect: Recommended specs: Mid-Range ($300-500) The sweet spot: Look for: High-End ($500+) The premium experience: Common Pitfalls to Avoid Setting Up Your New Monitor Quick tips I’ve learned: Future-Proofing Your Purchase Consider these upcoming trends: My Personal Recommendations (2025) For Competitive Gaming Best All-Rounder Premium Experience Final Thoughts Remember, the “best” gaming monitor is the one that fits your needs, budget, and gaming style. Don’t get caught up in marketing hype or specs that won’t impact your experience. Quick Decision Guide: Got questions about specific monitors? Drop them in the comments below! I test new monitors regularly and love helping fellow gamers make informed decisions. Pro Tip: Always check reviews with actual response time measurements, not just manufacturer claims! Want more gaming hardware guides? Subscribe to our newsletter for weekly updates and detailed reviews. (Updated: February 2025 with the latest monitor technology and recommendations)

Complete Home Office Setup
Electronic, IT

Complete Home Office Setup Guide: Essential Gear for Remote Workers (2025 Edition)

Hey there, fellow remote worker! After three years of working from home and helping countless readers optimize their home office setups, I’m excited to share my complete guide to creating the perfect workspace. Whether you’re new to remote work or looking to upgrade your current setup, I’ve got you covered with real-world tested recommendations. “Complete Home Office Setup” Why Your Home Office Setup Matters Let me share a quick personal story: When I first started working remotely, I thought my laptop on the kitchen table would suffice. Two weeks of back pain and terrible video calls later, I realized how wrong I was! A proper home office setup isn’t just about comfort – it’s about productivity, professionalism, and most importantly, your health. Essential Categories: The Foundation of a Great Home Office 1. The Perfect Desk Setup Desk Selection After trying various options, I’ve found that height-adjustable desks are worth every penny. My top recommendations: Pro tip: Get a desk at least 48 inches wide – you’ll thank me later when you need to spread out your work! Chair – Your Most Important Investment Trust me on this one – don’t skimp on your chair. My recommendations based on personal testing: Remember: The best chair is one that fits your body type and work style. 2. Tech Essentials Monitor Setup This made the biggest difference in my productivity: Personal tip: If you can only get one thing, get a good monitor. Your eyes will thank you! Peripherals That Matter Keyboard: Mouse: 3. Audio and Video Setup Webcam After countless video calls, I’ve found these work best: Microphone and Audio Don’t underestimate good audio – it’s crucial for professional communication: 4. Lighting and Background This is often overlooked, but proper lighting makes you look much more professional: Creating the Perfect Environment Cable Management Here’s my simple system: Storage Solutions Keep your workspace clutter-free: Comfort and Ergonomics Essential Accessories Wellness Items Don’t forget these often-overlooked essentials: Budget Breakdown Let me break down three realistic setups: Starter Setup ($800-1000) Mid-Range Setup ($1500-2000) Premium Setup ($3000+) My Personal Setup Journey When I first started, I made the mistake of buying cheap gear to save money. After replacing everything twice, I learned it’s better to buy quality items once. Here’s how I built my setup over time: Tips for Success Daily Habits Maintenance Schedule Common Mistakes to Avoid Looking Ahead: Future-Proofing Your Setup Consider these emerging trends: Final Thoughts Remember, building the perfect home office is a journey, not a destination. Start with the essentials and upgrade over time based on your needs. The key is finding what works for you – there’s no one-size-fits-all solution. Have questions about setting up your home office? Drop them in the comments below! I’d love to help you create your perfect workspace. Pro Tip: Check for company reimbursements or tax deductions for home office equipment – you might be surprised what’s covered! Want more remote work tips? Subscribe to our newsletter for weekly updates and guides on making the most of your home office life. (Updated: February 2025 with the latest product recommendations and pricing)

Troubleshooting Wi-Fi Keeps Disconnecting
IT

Solved: Why Your Wi-Fi Keeps Disconnecting (Ultimate Fix Guide 2025)

Hey there! Is your Wi-Fi driving you crazy with constant disconnections? Trust me, I’ve been there. After helping countless readers and dealing with this frustrating issue myself, I’ve put together this comprehensive guide to get you back online for good. Let’s fix this together! “Troubleshooting Wi-Fi Keeps Disconnecting” Why Does My Wi-Fi Keep Disconnecting? Before we dive into solutions, let’s understand what might be causing these annoying disconnections. Through my experience, these are the most common culprits: Common Causes Device-Specific Solutions Windows Solutions (That Actually Work) 1. Update Those Network Drivers I can’t tell you how many times this simple fix has saved the day. Here’s my tried-and-tested method: Pro tip: If Windows says you have the latest driver, don’t trust it blindly! Visit your laptop manufacturer’s website for the most recent drivers. I’ve often found newer versions there. 2. Power Management Settings This sneaky setting has caused countless headaches in my tech support experience: I discovered this gem when my own laptop kept disconnecting during video calls. Haven’t had an issue since! 3. Network Reset (The Nuclear Option) If you’re still having issues, here’s the big guns: Warning: This will remove all your saved networks, so keep your passwords handy! Mac Solutions 1. Remove and Re-add Wi-Fi Configuration This fixed my MacBook’s persistent connection drops: 2. Reset the SMC and PRAM Sounds technical, but it’s simpler than you think: For Intel Macs: For M1/M2 Macs: 3. Create a New Network Location This lesser-known fix worked wonders for my coffee shop connectivity issues: Android Solutions 1. Toggle Airplane Mode Sometimes the simplest fix is the best: I use this as my go-to first step – it works surprisingly often! 2. Reset Network Settings When all else fails: Note: This will remove saved networks and paired Bluetooth devices. Router-Side Solutions 1. The Perfect Router Placement Let me share a real-world example: My Wi-Fi issues disappeared when I moved my router from behind the TV to a higher shelf. Here’s what I learned: 2. Choose the Right Channel This is a game-changer in apartment buildings: 3. Update Router Firmware I do this quarterly, and it’s prevented many issues: Pro tip: Note down your settings before updating, just in case! Advanced Tips That Made a Difference 1. Check for Device Limits Some routers limit the number of connected devices. In my home office setup, I hit this limit without realizing it. Check your router’s settings and increase the limit if needed. 2. Use Quality of Service (QoS) Settings This was a lifesaver during work-from-home: 3. Consider Mesh Wi-Fi If you’re in a larger home, consider a mesh system. I switched to one last year, and it eliminated dead zones completely. When to Call Your ISP If you’ve tried everything above and still have issues, it might be time to contact your ISP. Here are signs it’s an ISP issue: Prevention Tips Here’s what I do to prevent Wi-Fi issues: Final Thoughts Remember, Wi-Fi issues can be complex, but they’re usually fixable. Start with the simplest solutions and work your way up. Don’t forget to document what works for you – it’ll help next time! Quick Emergency Fixes When you need to get online fast: Have you tried any of these solutions? What worked for you? Share your experience in the comments below – I’d love to hear your Wi-Fi victory stories! P.S. Keep this guide bookmarked for future reference. Wi-Fi issues have a habit of popping up at the worst times! Want more tech tips? Check out our other guides on improving your digital life, and don’t forget to subscribe to our newsletter for weekly tech insights. (Updated: February 2025 with the latest solutions for Windows 11, macOS Sonoma, and Android 15)

2025 iPad Buying Guide
Electronic

Which iPad Should You Buy? A Decision Guide for Every Budget (2025 Edition)

Hey there, fellow tech enthusiasts! After spending years testing various iPads and helping countless friends and family members choose their perfect tablet, I’m here to break down Apple’s somewhat confusing iPad lineup. Whether you’re a student on a tight budget or a professional looking for a laptop replacement, I’ve got you covered. Let’s find your perfect iPad match! “2025 iPad Buying Guide” Breaking Down the Current iPad Family: 2025 iPad Buying Guide Apple currently offers four distinct iPad models, each with its own strengths and target audience. I’ll share my personal experience with each model to help you make an informed decision. iPad (10th Generation) – The Sweet Spot for Most Users Starting at $449, the standard iPad 10th gen is what I often recommend to friends who want a reliable tablet without breaking the bank. Here’s why I love it: The 10.9-inch Liquid Retina display is stunning for watching Netflix or browsing photos. During my testing, colors appeared vibrant and natural, making it perfect for casual content consumption. The A14 Bionic chip handles everyday tasks smoothly – I’ve never experienced any lag while multitasking between Safari, Notes, and YouTube. Who should buy this iPad? iPad Air (5th Generation) – The Power User’s Dream When my sister, a digital artist, asked for an iPad recommendation, I immediately pointed her toward the iPad Air ($599). The M1 chip is a game-changer, offering nearly the same performance as the Pro models at a more reasonable price point. What makes the Air special is its versatility. Connect it to the Magic Keyboard, and you’ve got a legitimate laptop replacement. Pair it with the Apple Pencil 2, and it becomes a powerful creative tool. I’ve seen my sister create stunning illustrations with virtually no lag. Perfect for: iPad Pro (11-inch and 12.9-inch) – The No-Compromise Option Let’s talk about the iPad Pros – these are the devices I use for my own content creation. Starting at $799 for the 11-inch and $1,099 for the 12.9-inch, they’re not cheap, but they’re worth every penny if you need the absolute best. The M2 chip is blazingly fast. I regularly edit 4K videos on my 12.9-inch Pro, and it handles everything like a champ. The ProMotion display with its 120Hz refresh rate makes everything feel incredibly smooth – once you try it, it’s hard to go back. The 12.9-inch model’s mini-LED display deserves special mention. The contrast and brightness are simply stunning, making it ideal for photo editing and watching HDR content. Best suited for: iPad Mini (6th Generation) – The Portable Powerhouse The iPad Mini ($499) holds a special place in my heart. It’s my go-to travel companion, fitting perfectly in my jacket pocket or small bag. Despite its compact size, it packs serious power with the A15 Bionic chip. I love using it for reading e-books, taking quick notes, and gaming. The form factor makes it perfect for these tasks, and the Apple Pencil 2 support turns it into a super portable note-taking device. Ideal for: Making Your Decision: Factors to Consider (2025 iPad Buying Guide) Budget Considerations Let me break down the real-world costs, including essential accessories: Pro tip: Watch for sales at major retailers – I’ve seen discounts of up to $100 on iPads and significant savings on accessories. Storage Options Here’s my practical advice on storage: I personally regretted getting the 64GB model in the past – it fills up faster than you’d think! My Personal Recommendations After years of using various iPads, here are my honest recommendations based on user profiles: For Students:iPad Air 64GB with Apple Pencil 2. It’s powerful enough for note-taking, research, and creative work, while being relatively affordable. The M1 chip will keep it relevant for years. For Casual Users:iPad 10th gen 256GB. Great display, solid performance, and enough storage for apps, photos, and downloads. It’s the best value for everyday use. For Professionals:iPad Pro 12.9″ 256GB with Magic Keyboard and Apple Pencil 2. Yes, it’s expensive, but if you’re using it for work, the larger screen and extra power are worth the investment. For Travelers:iPad Mini 256GB with Apple Pencil 2. The perfect balance of portability and functionality. It’s powerful enough for most tasks while being incredibly easy to carry. Final Thoughts Remember, the “best” iPad is the one that fits your specific needs and budget. Don’t feel pressured to buy the most expensive model if you don’t need its features. I’ve seen many people perfectly happy with the base iPad, while others couldn’t live without their Pro. Feel free to drop a comment below with your use case, and I’ll be happy to provide more specific advice. Also, check out my upcoming comparison between iPadOS 17 features across different iPad models to help you make an even more informed decision. What’s your experience with iPads? Which model caught your eye? Let’s chat in the comments below! (Note: Prices mentioned are in USD and are subject to change. Always check Apple’s website or authorized retailers for current pricing.)

Scroll to Top